Privacy Settings for Facebook
By: Greta Schraer
Social networking is such a powerful tool. Within it lies the greatest of possibilities… sharing pictures with distant relatives, finding childhood friends and staying in touch with those who relocate. It can be a very valuable way to connect and communicate. However, it is important that you know just WHO you are communicating with. It is said that once you post on the internet that image or text is now in cyberspace forever.
Facebook seems to be that social network that nannies are using quite often. We thought we would take some time today to make sure you understand just how to chance your profile settings.
Step 1 – Finding the Privacy Settings
In the below picture you will see the top of a profile screen. In the upper right hand corner you will see the word “Account”:
When you click on “Account” you see a menu bar drop down. Choose the “Privacy Settings” option from that menu.
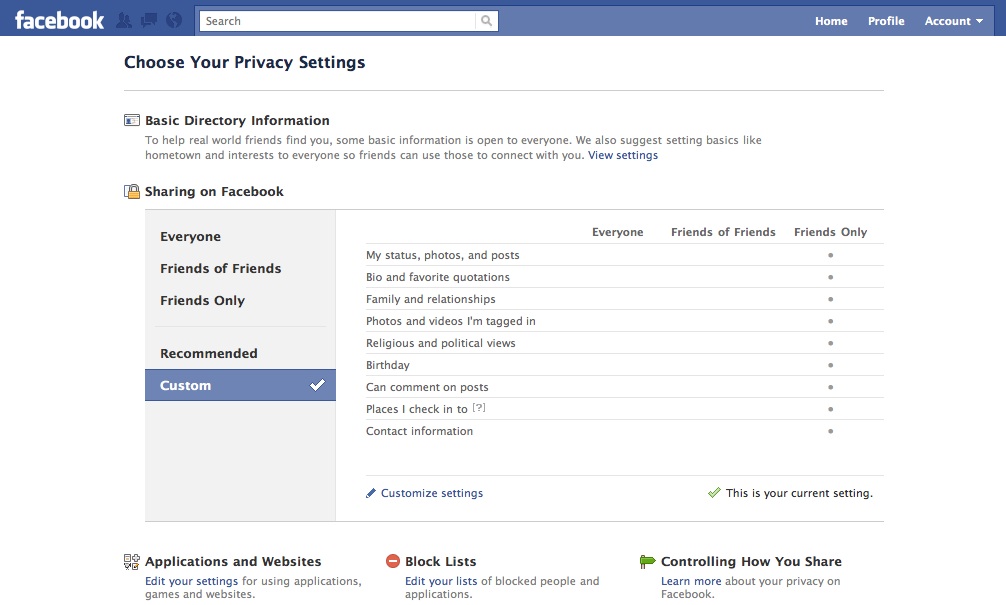
You will then be taken to the screen above. This is where you can see which of your information that you have shared on Facebook is being seen by your “Friends Only”, “Friends of Friends”, or “Everyone”. You will have the option to change each of the categories by choosing the “Customize Settings” option listed in blue under the list.
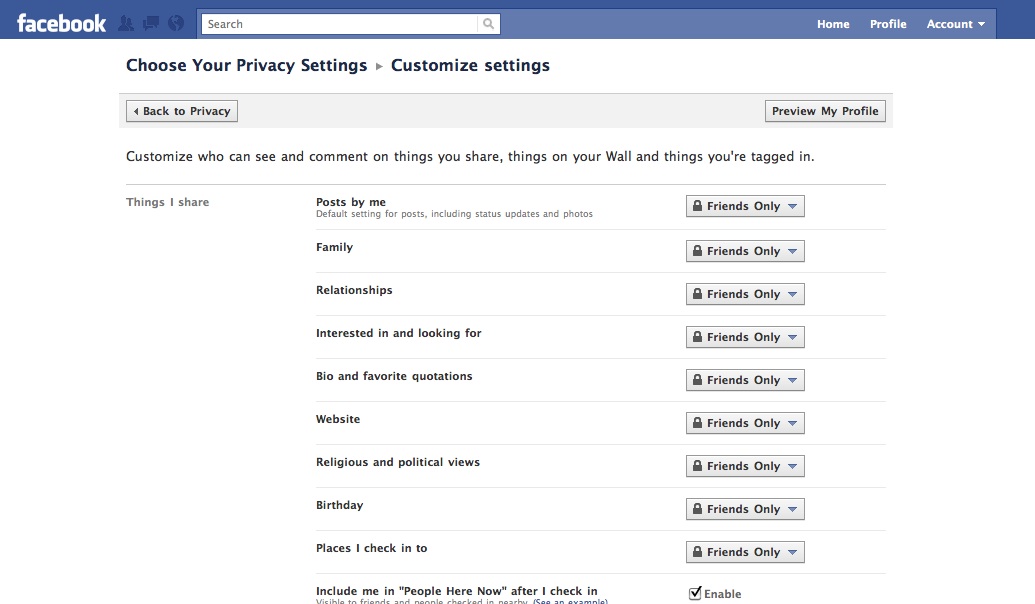
You will be directed to this page:
Step 2 – Customize Your Settings
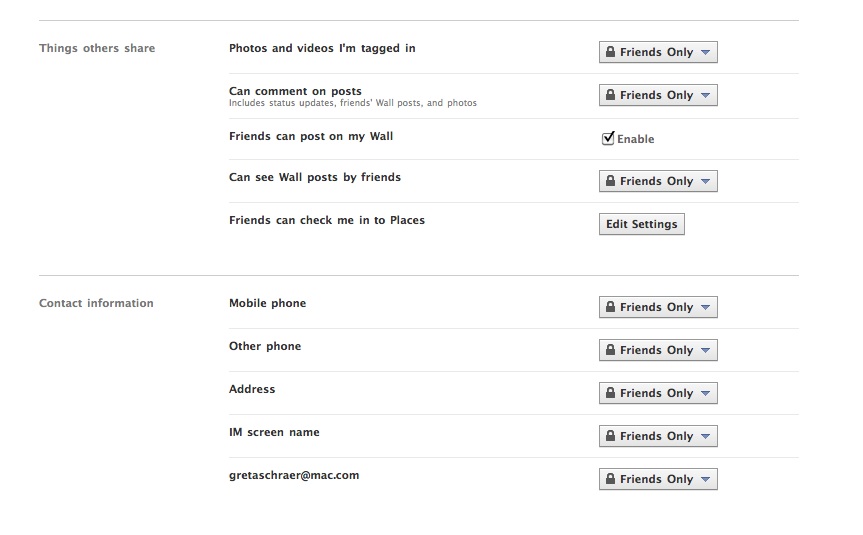
This screen gives you the option to customize each section. As you see I have chosen for “Friends Only” to see any and all information on my profile. Take some time to become familiar with each of the choices and decide how private you should make your profile.
After you are finished Click “Back to Privacy” at the top of the page.
Step 3 – Learn More About Privacy
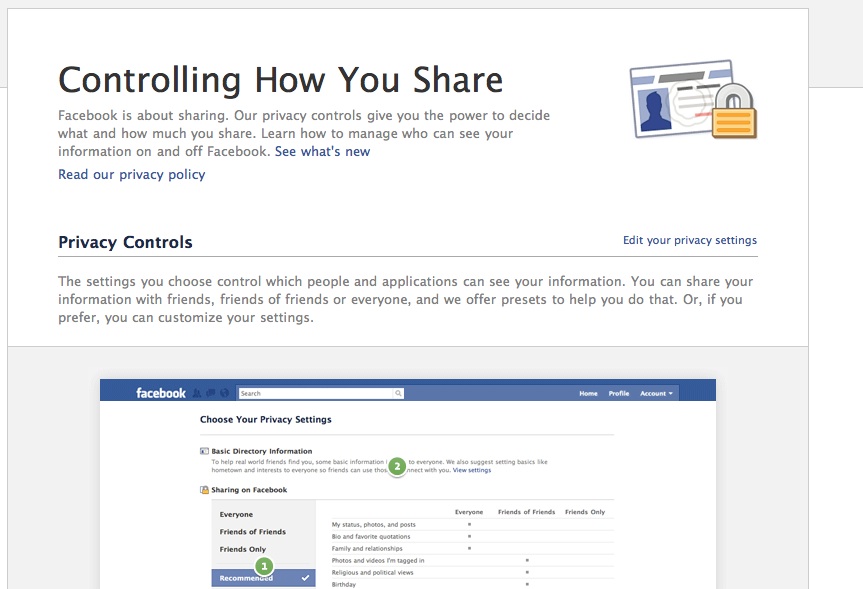
 Once you have gone back, to the “Choose Your Privacy Settings”, take a look at the bottom right hand corner of your screen. Facebook has much more information available to explain your options with privacy. Click on the “Learn More” text to move to the “Controlling How to Share” screen (shown below).
Step 4 – Control Each Post
Did you know that you can control and customize each post that you share on facebook. This allows you to keep some statuses, links, and the items more private that your whole profile (see below).
Step 5 – Control Other’s Posts
Occasionally you may find yourself tagged in a picture or status that someone else included you in without your permission. If you are uncomfortable being linked to it, you may untag yourself to prevent it from appearing on your profile, and therefore unseen by your friends (see below). 
Step 6 – Check It Out
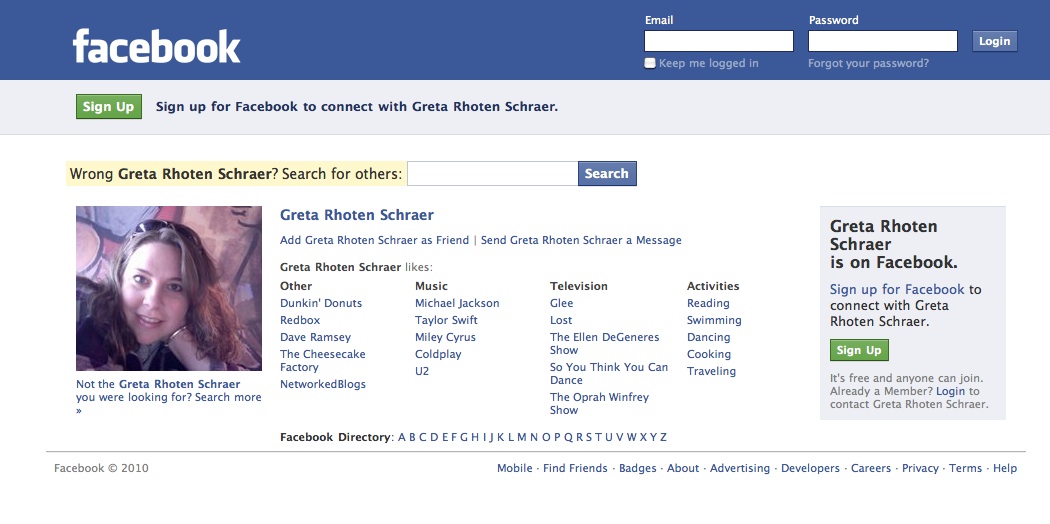
Take the time to LOG OUT of Facebook and then search yourself. Below you will see I typed in “facebook greta schraer” and google brought up a link to my profile page. This will be how you others (who are not your friends) will view your profile at the current privacy settings.
You can see that my photo is viewable as well as some of my likes. I do want friends to be able to find me. My status, pictures, and contact information are not available here. This looks good to me!
I hope this has helped you see that changing your Facebook Privacy Settings is not very difficult at all! It is worth the small amount of time to go through the process. Also, do the final check, make sure you know what the world will see if it googles you!
Have fun and stay safe social networking!




This was a well thought out piece of work. Thank you for the information and the detail provided. I’d like to share this article with my candidate pool and would like your permission to do so. Please advise. All the best, JN R