Classic Tie-dye T-shirts
By: Lindsey Kanis
The boys I watch are getting to great ages where they get along well enough to work together, follow directions (though simple and few) and are able to be excited for end results. The best part is that nobody ever minds getting a little messy. I mean, except for me. We’ve taken to a lot of activities lately, as we should in the summer. We have made soap, baked Dad’s birthday cookie cake, planted flowers, herbs and tomatoes, finger painted with pudding, made a bottled scavenger hunt and even created a “teddy bjorn” for stuffed animals to ride on the tricycle.
Our latest craft was a brave (and my first) attempt at tie-dying. I bought a kit at the craft store and snagged t-shirts for $2 each while I was there. I knew that tie-dye was not as easy as the box made it look… especially with small children. My kids and I met up with Nanny Greta and her triplet boys and got to work. Greta and I had agreed that I would be doing the “dirty work” of tie dying with one child at a time outside while she had the task of controlling the (surprise!) chaos inside.
Before we began we made a game plan:
1-The entire process was to be done outside.
2- Greta would send one child out at a time to dye his own shirts. Then I would send them in, she would wipe them down and make sure no dye was tracked into the house. We followed said plan well and I think the kids liked the one-on-one craft time.
The process went like so:
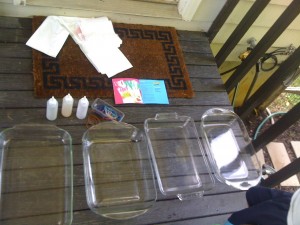
First I prepped the work space (our deck) with all the supplies.
1- Bring your t-shirts (each kid had 2) out to Lindsey when Greta sends you.
2- Put the shirts in bucket of water until saturated.
3- Ring shirt out and apply rubber bands in desired pattern. *This is something I ended up doing for most of the kids since they are all between 3 and 5 years old.*
4- Squirt desired colors one at a time on the shirt in sections (determined by placement of rubber bands).
5- Rotate shirt -like you would a hotdog on the grill- and repeat step 4 as needed.
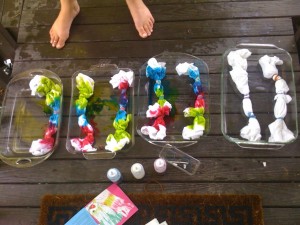
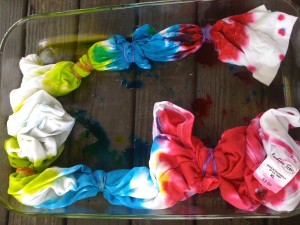
6- Place shirt in pan.
7- Get hosed off. Hose off work space.
Now, mind you, I did this eight times with four kids. I think I might know what I’m talking about when I say:
-If it’s your first time, go ahead and get the kit. Ours was $15. It comes with squirt bottles, directions for several tie-dye methods and rubber bands. We used a ton and I had to dip into my kitchen stash.
-Read the directions. Most kits tell you to wash all the shirts in advance without fabric softener.
-Prepare work space with glass pans (glass will not stain and you can put all of them in the diswasher at the end), junky towels, garbage bags, a couple of old buckets, a garden hose, GLOVES! (I ignored that part of the directions for what I thought was convenience and ended up with Smurf hands for 5+ days. Gloves are worth it.)
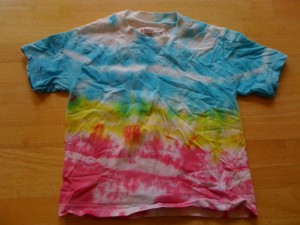
-It is okay to allow colors to touch and bleed together, but in moderation. Too much dye makes for a blotchy shirt that lacks any evidence of “tie-dye”. I tried to make our color patterns so that even if colors bled they would make purple or green instead of muddy browns.
-Have a plan for AFTER you finish dying the shirts. Our box said to allow the dye to set for 4-6 hours. I ended up placing each shirt in a plastic grocery bag and putting all of those bags into a garbage bag in order to transport the shirts to my house for proper setting a washing procedures. Also, I had an extra garbage bag to clean up all of the disposable supplies and carried all of it to the garage. It never even had to go in the house.
-When washing shirts after the setting period:
1- Use less detergent than normal and wash as a large load even if its only a few shirts.
2- I washed the shirts twice, just to be sure.
3- Be sure to run a blank wash cycle through your washing machine so you don’t end up with dingy socks next go-around.
As much as I like fun and games, I know kids learn in all kids of ways. Hands on learning and one-on-one experiences are just a couple of ways to open the eyes of children. Our kids learned tons during this experience. Since each child is different, I saw each one realizing something new. One child was completely enamored with doing everything on his own. Another simply directed me to put this here and that there to his liking while he watched intently. Still another child wanted to know all of the hows and whys but could care less about actually creating something. I did most of the process for this child and he still loved his shirts. Because it was something he was a part of and got to watch happen. And I know everyone learned patience. Each child had to wait for a turn. At one point, I looked up to see all these little heads looking out the window to observe while Greta narrated what was happening. Greta’s kids had to wait days for their shirts since I didn’t see her again until that Friday and she couldn’t pass the shirts on to the kids until Monday. All in all, it went well. Just ask the kids… mine would wear their shirts everyday if they could.
 Lindsey is a professional nanny in Cincinnati, Ohio. She shares her days with boys A & Z, with creativity, zest and excellence. Lindsey is engaged to a wonderful man, Rob, who worked as a manny when they met (*note that he is our token manny in Cincy -the only one we’ve met to date). In her spare time she loves to travel, bake and cook, spend time with her family and get lost in her art. She is an amazing photographer and has become the “professional nanny decorator” in our community. To see some of her art, check out her personal blog here. Lindsey is a wonderful person and nanny and we thank her for sharing this fun craft today! Read more about Lindsey as a nanny here: Meet Nanny Lindsey.


Great article on tie-dye! Over the years we have tie-dyed something almost every year for 12 years with my girl scout group, plus projects with my nanny charges. Lindsey is right gloves are a must! Don’t skip that step. I had the children doing most of the work and they all had gloves on. Also, we used cover-ups over their clothes. We also worked in small groups. I covered everything with large plastic yard bags so there was no staining. Also, once the shirts were done I wrapped them in plastic wrap to let them cure. I found that leaving them for 24 hours before rinsing really intensified the colors.
Super fun project – so glad you shared it with us!!
Hi…My name is Jimmy and I make tie dyes. If you ever decide to give it another shot just e-mail me at rosavicious@mytiedyes.com and I’ll be happy to answer any questions about tie dyes.
i love this palette the colors are great all colors go great they pop out ,[url=http://theairamaxhyf.webs.com/#57481]Cheap Air Max shoes[/url]